Getting Started
Create a new app
Let's create a simple search app using create-react-app:
npx create-react-app search-app
cd search-app
Then, install the React-SearchKit.
npm install react-searchkit
React-SearchKit does not come with dependencies: all dependencies are declared as dev and peer, to allow you to use
your own version of dependencies (e.g. React) in your application.
Make sure you install all
peerdependencies when using React-SearchKit!
Bootstrap it
Open your main App component, e.g. src/App.js, and add the main react-searchkit component.
First, import the main component ReactSearchKit.
import { ReactSearchKit } from 'react-searchkit';
Then, add it to the content of your render() method to render ReactSearchKit.
You should end up with something similar to:
import React, { Component } from 'react';
import { ReactSearchKit } from 'react-searchkit';

class App extends Component {
  render() {
    return (
      <ReactSearchKit>
        <h1>My search UI</h1>
      </ReactSearchKit>
    );
  }
}

export default App;
Connect REST API endpoint
Change the ReactSearchKit props to define the REST API endpoint. For this example we are going to use Zenodo APIs.
Import the Invenio adapter and provide the minimal configuration.
import React, { Component } from 'react';
import { ReactSearchKit, InvenioSearchApi } from 'react-searchkit';

const searchApi = new InvenioSearchApi({
  url: 'https://zenodo.org/api/records/',
  timeout: 5000,
  headers: { Accept: 'application/vnd.zenodo.v1+json' },
});

class App extends Component {
  render() {
    return (
      <ReactSearchKit searchApi={searchApi}>
        <h1>My search UI</h1>
      </ReactSearchKit>
    );
  }
}
Note:
React-SearchKitcomes out of the box with support to OpenSearch 2 and Invenio REST APIs. To connect your own REST APIs, you can override the default configuration or provide your own adapter for your backend. Follow the next steps of this guide for detailed instructions on how to do it.
Add the first component
Import the SearchBar component.
import { ReactSearchKit, InvenioSearchApi, SearchBar } from 'react-searchkit';
Then, add the component as a child of ReactSearchKit.
class App extends Component {
  render() {
    return (
      <ReactSearchKit searchApi={searchApi}>
        <div style={{ margin: '2em auto', width: '50%' }}>
          <SearchBar />
        </div>
      </ReactSearchKit>
    );
  }
}
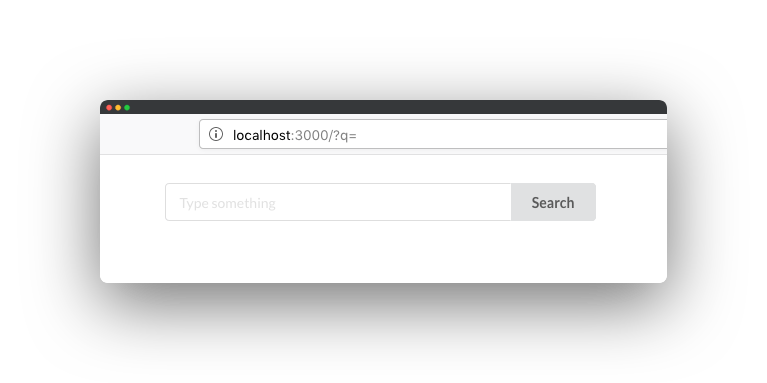
The page should look like to this:

If you hit Search, you should see a network request happening with the search query string that you have inserted
in the input field.
Display the results
Import the ResultsList component.
import { ReactSearchKit, InvenioSearchApi, SearchBar, ResultsList } from 'react-searchkit';
Then, add the component below the search bar.
class App extends Component {
  render() {
    return (
      <ReactSearchKit searchApi={searchApi}>
        <div style={{ margin: '2em auto', width: '50%' }}>
          <SearchBar />
          <ResultsList />
        </div>
      </ReactSearchKit>
    );
  }
}
After reload, you should the list of results after typing a query string in the search input and hitting Search.

Complete demos
In the src/demos folder, you can find multiple working example where you see and try most of the components.
Check the README.md file to learn how to start the demo application.